Since I saw the first Magic/Smart Mirrors appear on the net, I wanted to build one too for our guest bathroom. I had some boards of old wood lying around, from which I wanted to make the frame. Building the frame turned out to be the part, that took the longest. As I am very comfortable with Raspberry Pis, Linux and Software, it was not surprising that the hardware and software parts of the project turned out to be the easiest.
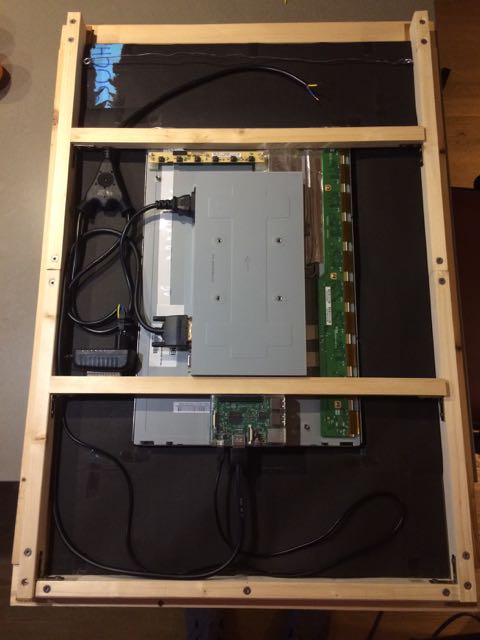
I used my good and reliable Makita SP6000 plunge circular saw to cut the boards for the frame. The 4 frame parts were then connected by metal angles for stability. The wooden frame around the mirror has a width of 5cm. To make the frame more solid and to get the depth needed for the hardware (mirror, display, connectors, Pi) I build an additional back frame of around 4cm depth. The back frame is open at the top for better ventilation.
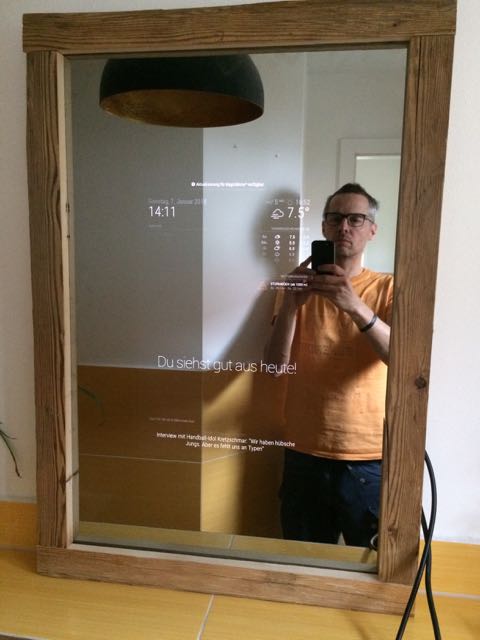
Total size of the mirror including the frame is 55 x 79 cm. I constructed a wire suspension to hang the mirror on the wall. I carefully covered the back of the mirror completely with black cardboard, to prevent any light shining through from behind. No ugly cables. The whole construction gets it’s power from a wall outlet behind the mirror.
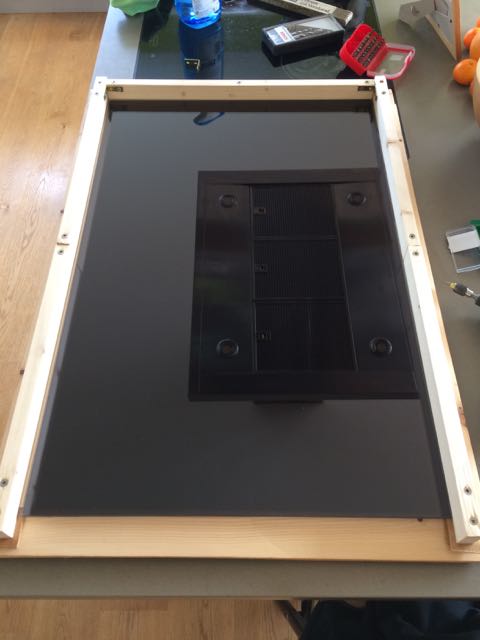
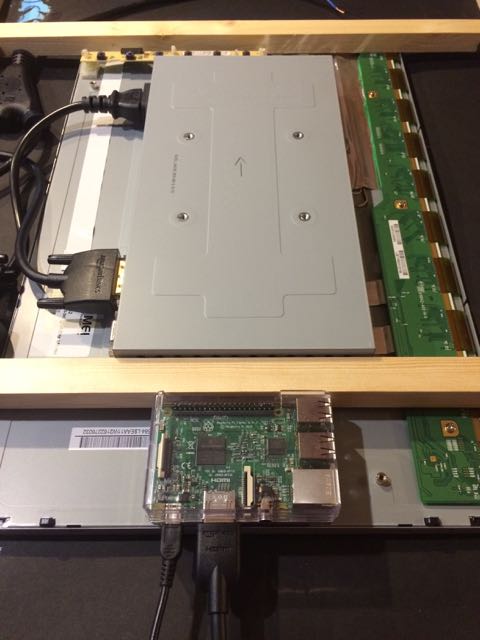
I wanted to have a cheap display with a good and practical resolution. For the display it is important, that it has the power connector on the side to save some space behind the mirror. I had an old 19” Viewsonic TFT display lying around, which could do the job. I removed the plastic frame around it with a spudge and screwdrivers, which worked well and was fast and easy. Unfortunately the first display started to fail after a couple of weeks running. I removed it and gave it to recycling. As the second display I ordered a used 19” Acer TFT from ebay for EUR 19, which does not have any problems so far. I attached the display controls with velcro tape.
A lot of research has gone into the mirror. The mirror is obviously the most important part of the project and has to be selected carefully. It has to be a spy- or 2-way-mirror with good transmission. I did not want a cheap looking mirror (acrylic, coated, film) so it had to be real glass. I read most of the posts in the hardware forum of the magic mirror project. There are regular collective orders organized by the community.
I started by trying to get a mirror from a local shop. I visited a glass manufacturer in Freiburg, who even had some good spy mirrors. Unfortunately and surprisingly they were already in the process of ending the production and could not supply one.
I then found Glas Star on the web. They are based in Bochum, Germany, and were able to deliver Pilkington mirrors. They also have good sample/test packages, which I ordered. The small sample mirrors looked great and I tested them with my display behind it. So I ended up ordering the “Pilkington Mirropane Chrome Spy 4mm” from Glas Star for EUR 99 in size 470 x 720mm. Production and delivery took around 2 weeks, which was ok for me.
I am using the fantastic Magic Mirror 2 software, running on a Raspberry Pi 3 with Raspbian Jessie. It has been running perfectly stable and without any problems for months now.
Here is the list of additional Modules that I have installed:
I use Remote-Control and ModuleScheduler to automatically turn off the TFT display at night. The Pi itself runs 24/7.
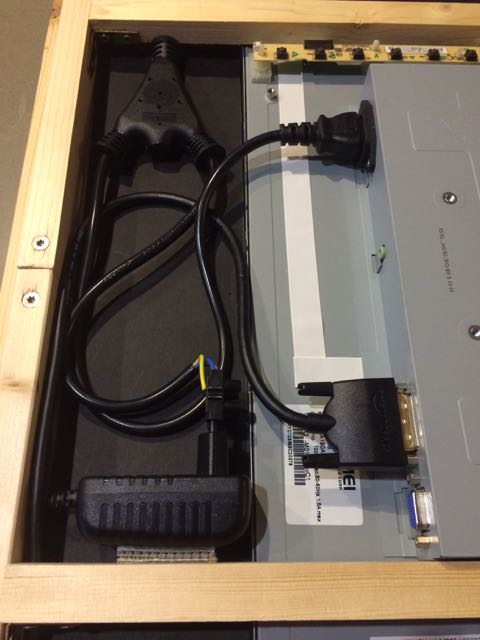
Supplying power to the Pi AND the TFT display at the same time turned out to be a little challenge. I did not want a bulky socket strip with 2 connectors, as this would have taken up way too much space behind the mirror. So I looked for a better way to distribute the power to two devices. I found a nice and flat Y-cable, which does the job, after modifying the cables. The Pi power supply connects to the cable via a small jack. I attached the power supply with velcro tape to the frame.
It certainly would be very nice to have a motion detection sensor behind the mirror, which would then turn on the display. Needs to be tested but should be possible in build phase 2.
Total cost around EUR 200.